
An exploration in Kigurumi Mask Post-processing

Introduction
This Earthchan kig represents the first full application of the Openkig project. By showing its development step-by-step, the hope is that that it’ll help others wishing to produce their own kigs (through Openkig or other means) to understand the general process involved. From sanding, to modding, to resanding, to painting, to adding details, to creating the wig.
Process
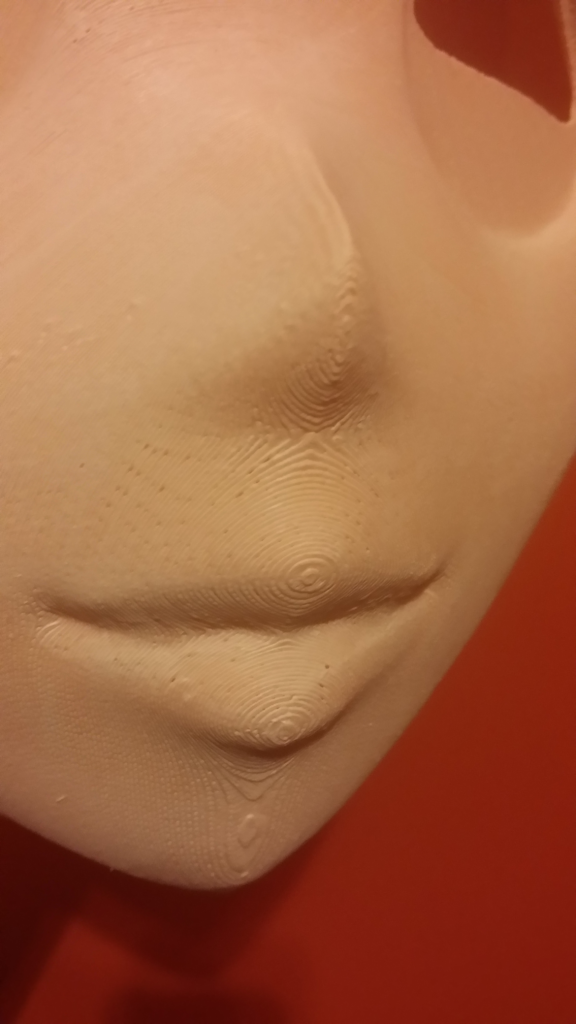
The 3D printing process happens in layers and leaves rings that radiate outwards. The first and primary goal in finishing a 3D printed kig mask is to smooth out those layer rings. Most 3D printing tutorials will recommend subtractive methods, like acid baths and direct sanding. However, for something the scale and thickness of a kig mask, these methods aren’t as optimal. An additive method, rather than subtractive, is generally what I’d recommend for print-to-wear kig masks.
The way that I’d recommend smoothing out the base is by building up layers of autobody primer and sanding them smooth. (I used Rust-oleum sandable primer, but other products are available.) You spray on a layer, wait for it to dry, spray on another layer, wait for it to dry, and then spray on a third layer. From there, you work on sanding it smooth. Start with a rough sand paper (like 120 grit) to get rid of the large ridges. Use a finer sandpaper (like P220 grit)

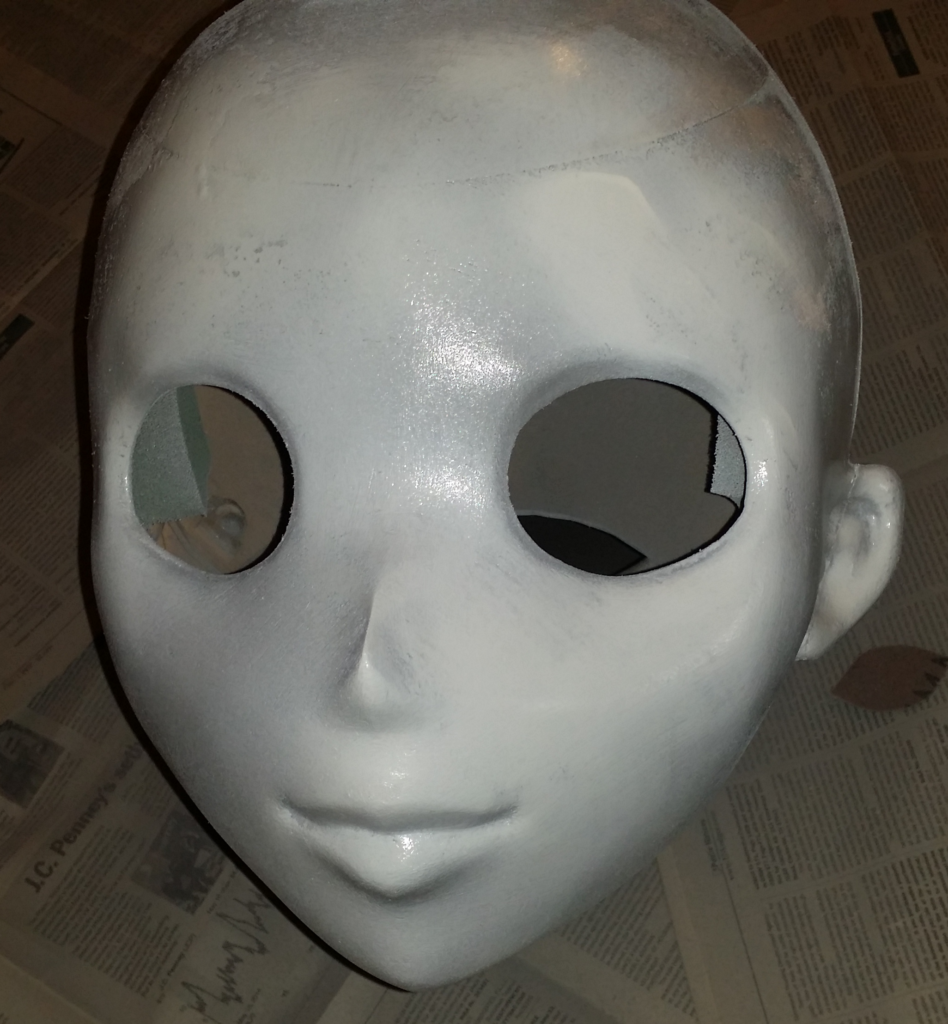
For sanding, start with a rough sand paper (like 120 grit) to get rid of the large ridges. Use a finer sandpaper (like P220 grit) so smooth it out fully. If you need to apply more sandable primer, feel free! As you can see by the mix of red and grey (picture to the right), I had to switch cans of primer at some point to full smoothness. Come prepared with more than one can of primer just in case.
Once you’ve sanded your mask smooth, you can move on to the painting process. The absolute best way to paint a kig mask is with an airbrush, but that does require a lot of materials that can be expensive if you’re only planning to use them once. It’s generally worth it, as an airbrush allows for the most uniform coverage, custom paint mixing, and can lay on small details like blush with a smooth gradient. Alternatively, though, you could spray paint the base coat of the mask. Though, it is advised that you keep each coat as thin as possible and spray far away from the mask to ensure the paint doesn’t build up or create a new surface texture.
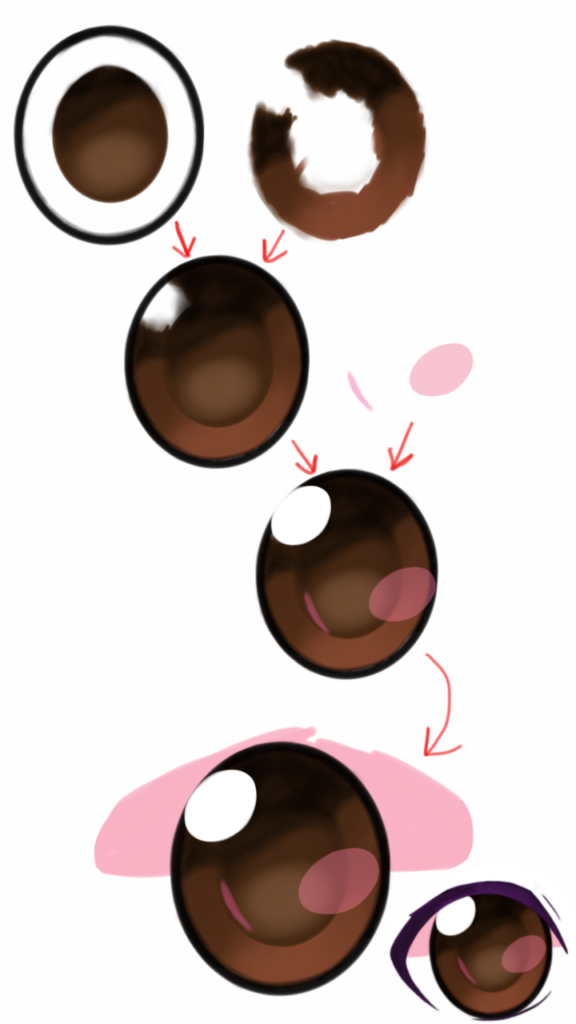
The next step in our mask making process is to create the eyes. This comes in two smaller steps; the eye decal and the eyelash. To create the eye decal, it’s probably most effective to do it digitally and print it off. You could also hand paint it or even airbrush it, if you so choose. In all cases the process is the same; you start with an outline, fill in the gradient color, and then add the eye shines on top. It is recommended you print or paint the eye decal onto a sturdy cardstock paper or thin plastic sheet. When you’ve printed it off, be sure to cut away the darkest parts of the eyes to allow the performer some vision.
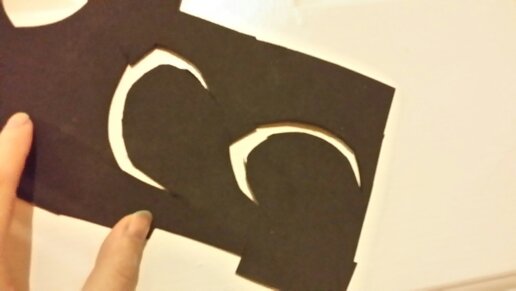
For the eyelashes, I used a thin sheet of craftfoam, cut out the shape I wanted, and then hot-glued it to the mask. If you’re afraid of making a mistake, keep in mind that the eyelashes can be removed (carefully) with a razor blade or box cutter if the positioning is off or if they need to be remade.
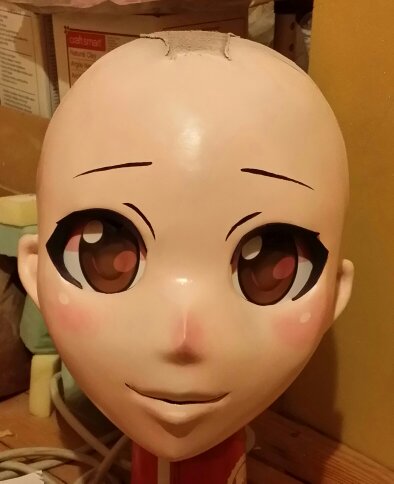
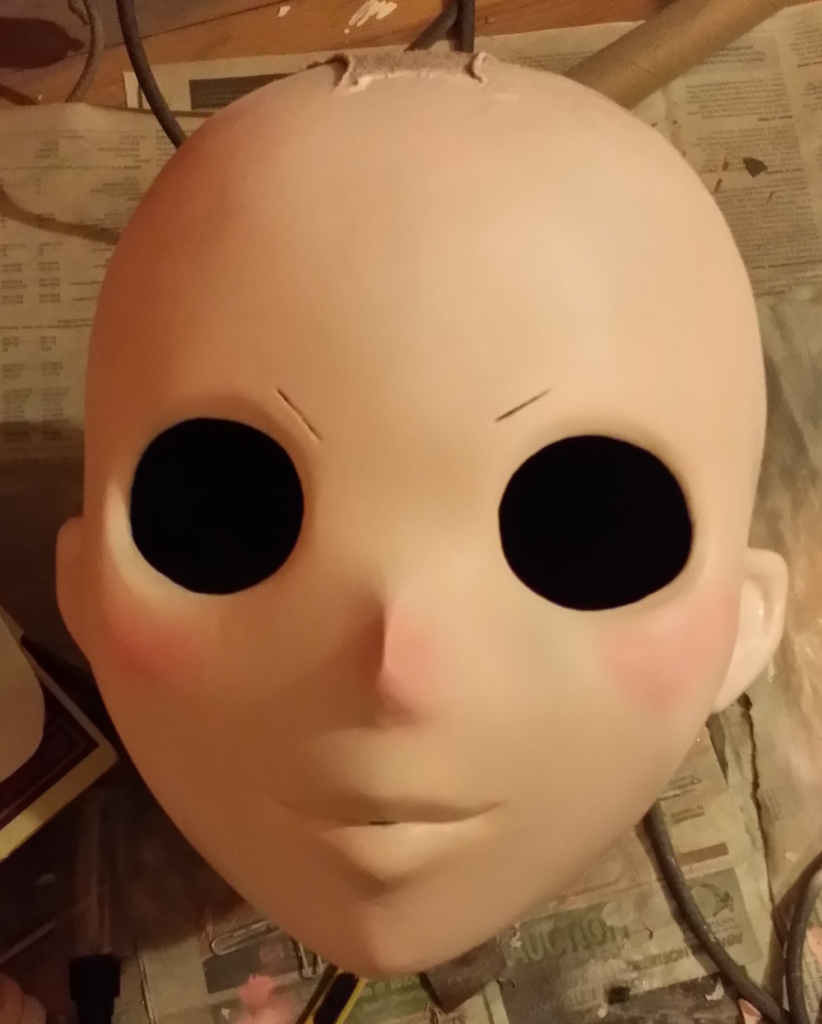
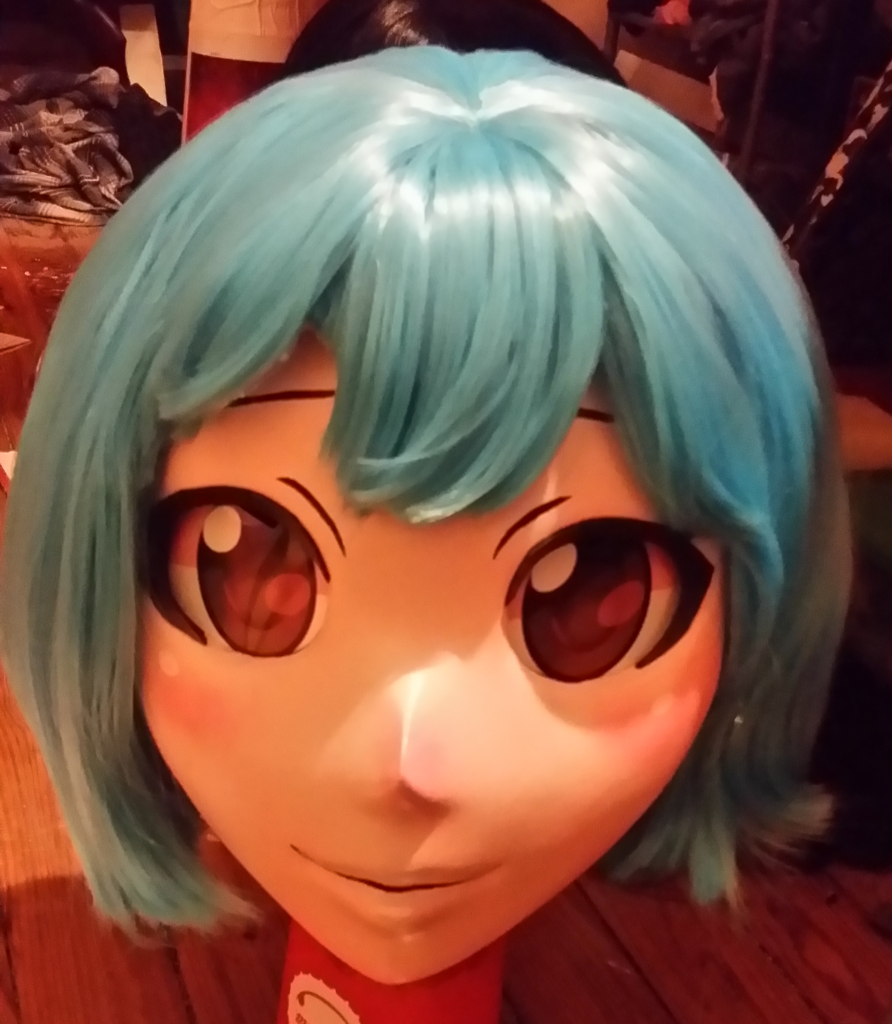
Once you’ve got the eyes finished, the final step in facial preparation is in adding whatever small details might help define the character; eyebrows, shines on the cheeks, drawn in mouth line, lip shine, etc. Each little detail you add helps give the mask personality so be sure to really dive in to this step. Generally, these small details are hand-painted, but you could just as easily make a stencil and airbrush/spray paint it for a more durable paintjob. When you’re finished, spray it with a matte sealant to lock in the paint.
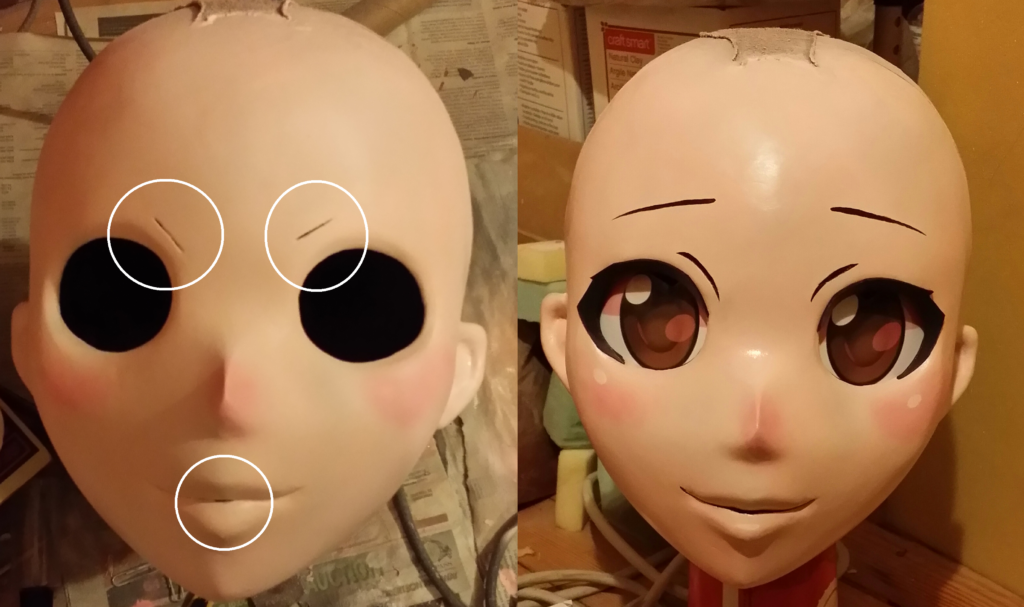
As a side note, notice from an earlier picture that the eyefolds and mouth are drilled through in ways that are hidden in the final design. Any time you can hide holes in the mask for vision or breathability, it’s generally a good idea to do so.
The process of making the wig isn’t inherently difficult or time consuming, it’s just difficult to explain. The gist of it is that you use three wigs to build up one large wig, working in layers from bottom to top. If you glue everything down and make sure everything’s going the right direction, you should have something you can style and trim into your desired haircut. A good, simple beginner tutorial to this can be found here or via DAME’s website; https://damekigurumi.com/Guide-Wig-Tutorial.
Once the new wig has been created, there’s two aspects to styling it; cutting and gluing. Cutting is pretty staight-forward. You take out your scissors and start clipping the hair down and thinning it until you’ve got the right length and general shape. A word of caution though; try to take this slowly. Remember, you can always make the hair shorter, but if you mess up and cut it too short, there’s no easy way to make it longer.
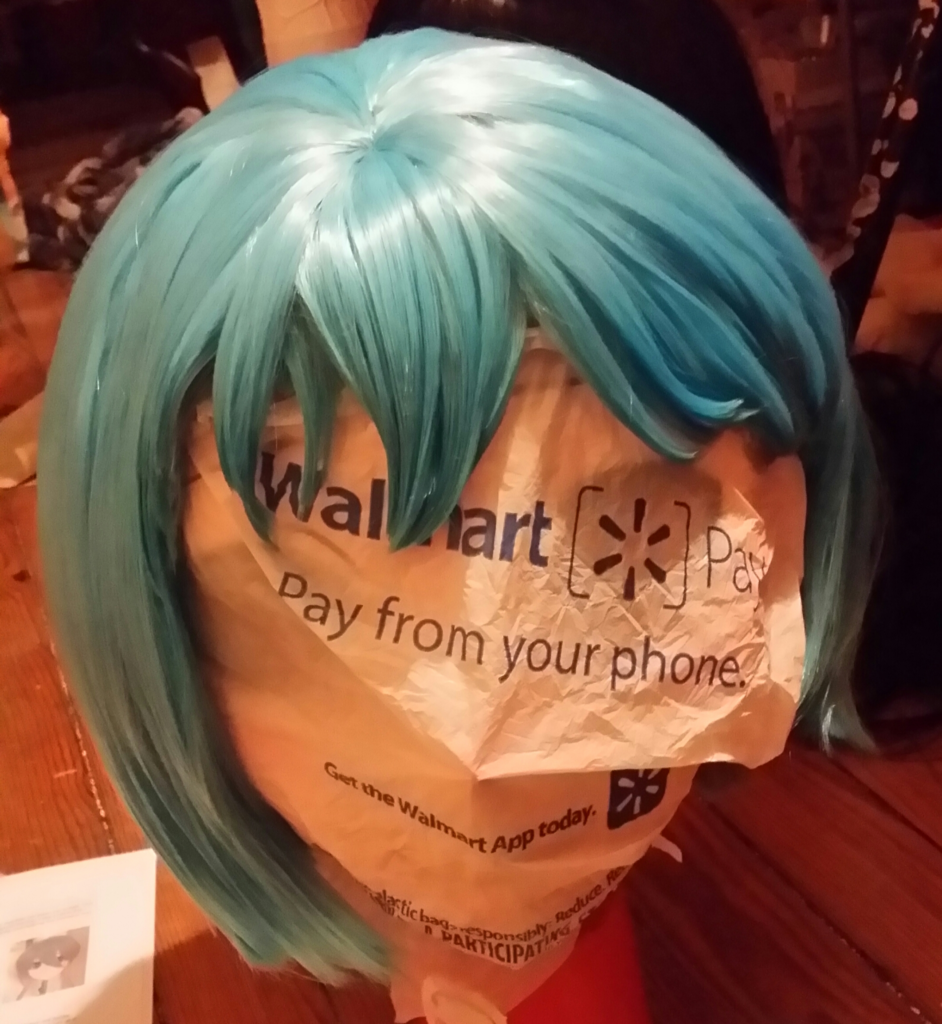
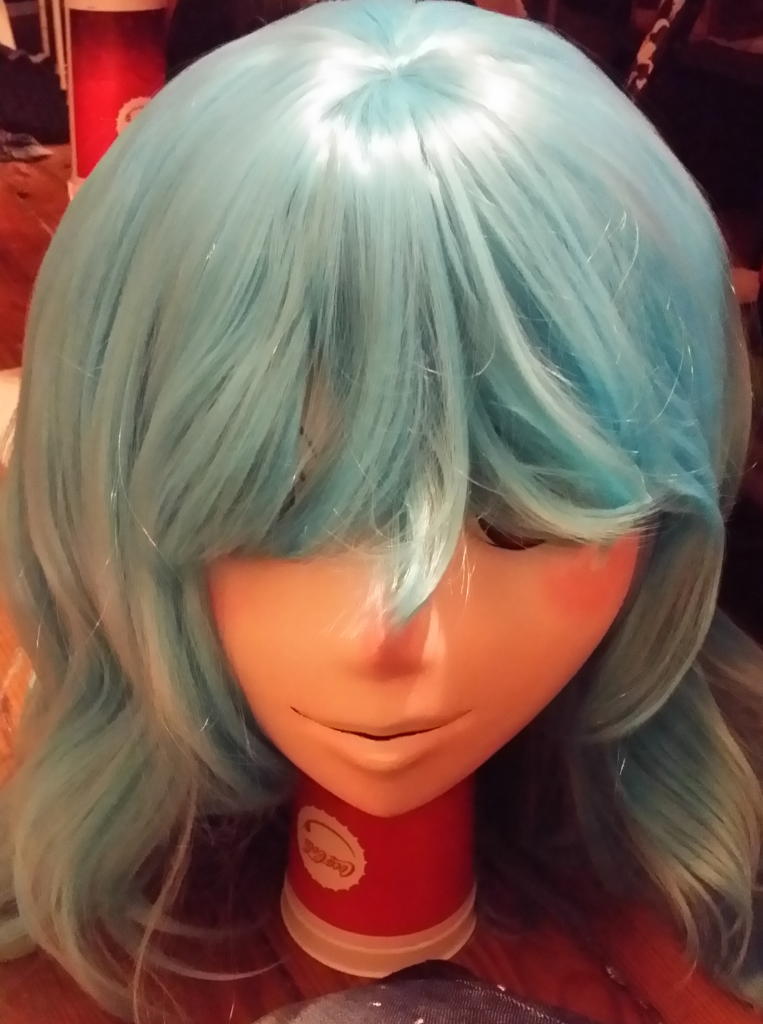
The final step is to glue the hair to your desired style. Most anime hair is pretty free-flowing except for the very well-defined spikey bangs (or ‘fringe’ if you’re in the UK), making this step fairly easy. First cover the face (I used painter’s tape and a grocery bag), then use hairspray and your fingers to pull the hair into a desired shape, then you work glue into the very ends of the bangs to set them. Let it dry overnight. Lots of glues will work for this purpose, but try not to use anything too stiff or brittle as it might scratch the paint on the face. I used a light fabric glue for EarthChan.
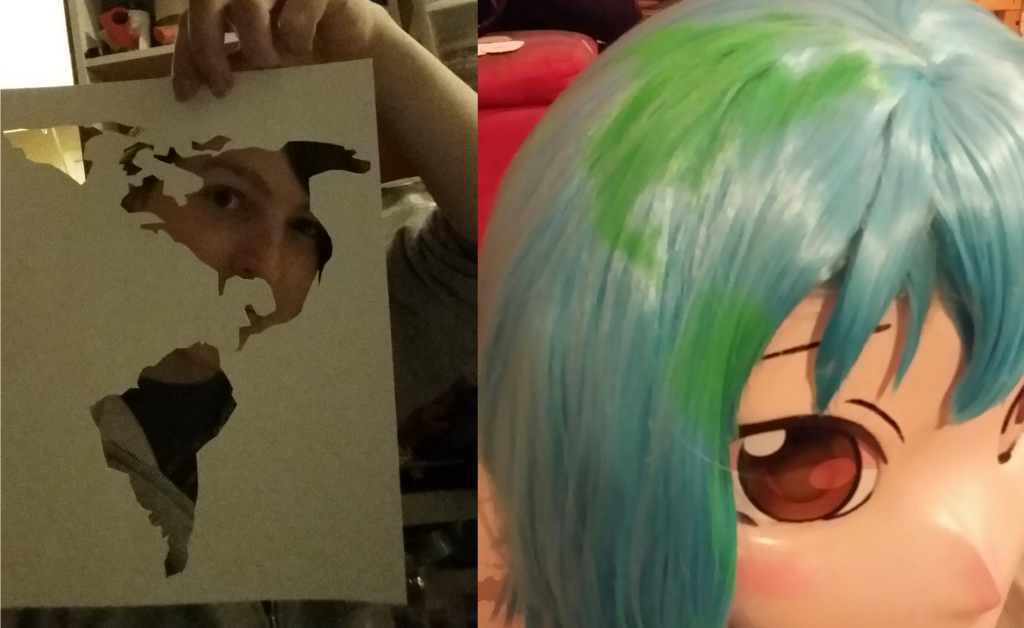
An added step, unique to Earthchan, was airbrushing the continents onto her hair. For this, I printed off properly scaled topagraphical maps, cut them out with an exacto-knife, and airbrushed them directly onto her hair using the printoffs as stencils.
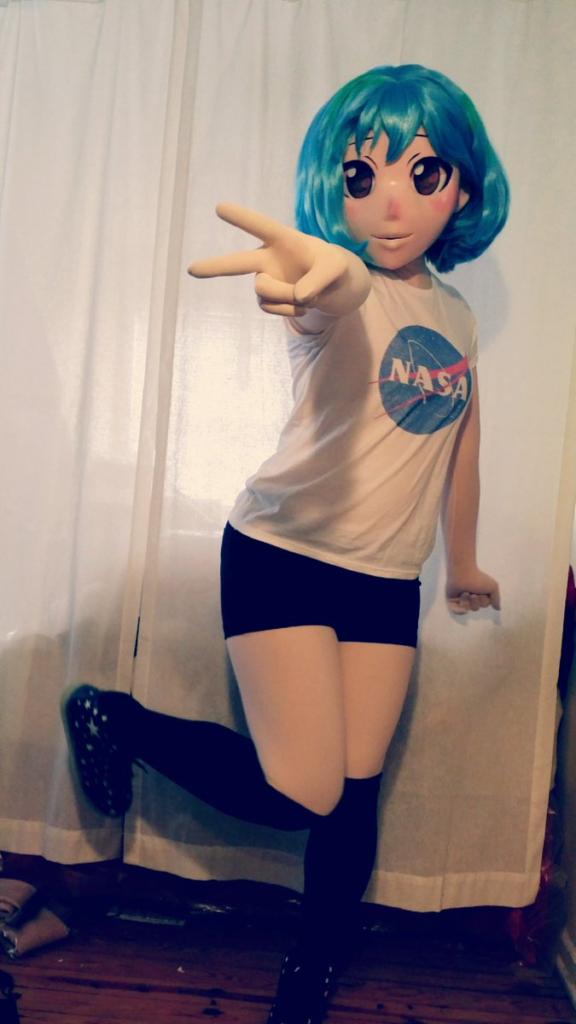
The end result, combined with costume, prop, and performer, is shown below. Hopefully you found this guide helpful. Feel free to share any 3D printed kigs you’ve finished with us on our Facebook page.
